Once upon a time, I used a bunch of notebooks to keep track of my work things. One notebook for meeting notes, another notebook for tasks, Outlook for my calendar, and lots of file folders for printed out paper for various projects. I thought maybe, just maybe, I could use a Filofax to organize it all.

So I went on the hunt for a new binder. I knew it would need to be an A5, I wanted one that would lay flat, look professional, and only get better with age, even after lots of daily use. So I set my heart upon the elusive A5 Ochre Malden. I found one on the Filofax UK site and had to pay a hefty sum to get it shipped across the pond to the US. It will be worth I said to myself, I will love it, and I will use it forever, and it will make me so much more organized. So I tendered the money, and waited.
It finally landed on my doorstep and I went to work setting it up. It came out of the box with a couple of scratches on it. I don't mind - I like that it makes the binder more rugged and loved looking. I expect it will get scratched and abused much more over time.
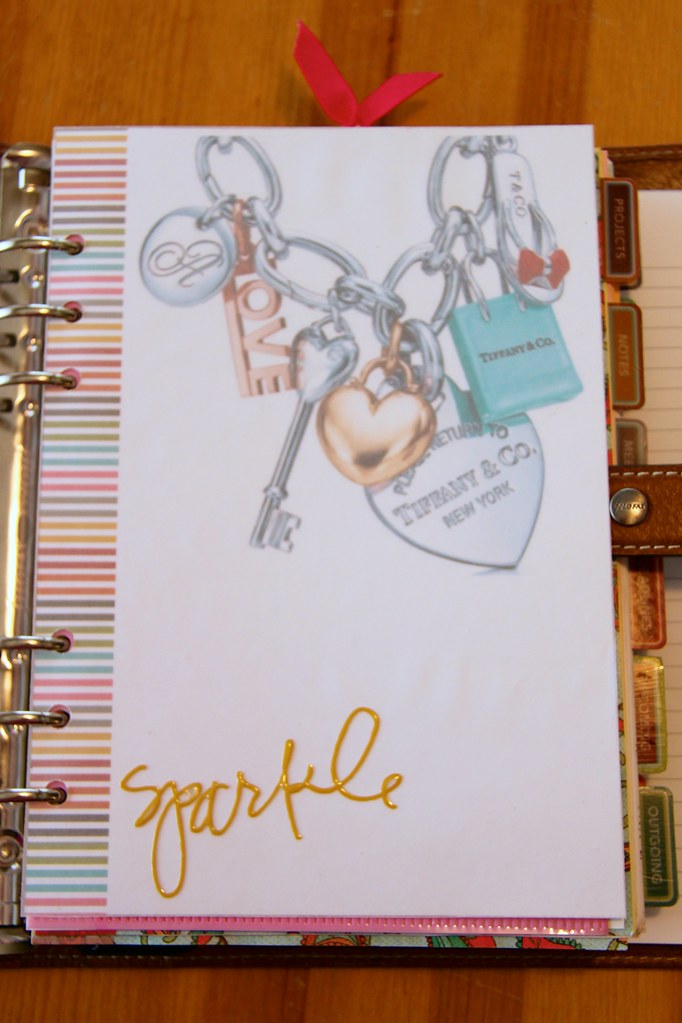
I made the front cover using a picture of a Tiffany charm bracelet (something I'm coveting at the moment) printed out on cardstock paper and overlaid with velum (to soften the look) and a sticker that says 'Sparkle' because I need to remind myself to sparkle at work!
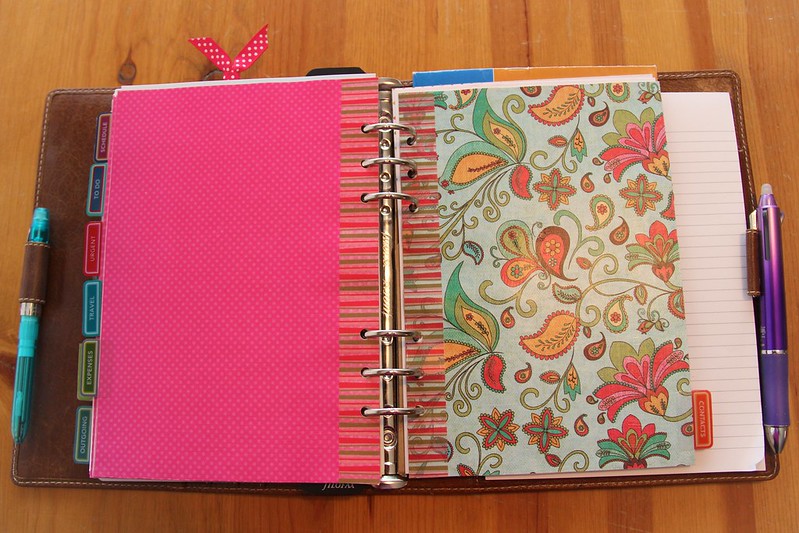
I also made my own dividers. I used an aqua paisley paper on the front, shocking pink polka dot paper on the back for an unexpected pop of color, and some washi tape. Rather than laminating the dividers, I used Mod Podge. I love this stuff. Laminated pages seem too stiff to me, but the mod-podged (is that a word?) pages are flexible and strong at the same time. Plus I used the glossy finish, so they have a nice sheen to them. I use the back side of the divider as a dashboard for the section when needed. I decided to use the girl of all work business tabs, and it came with twelve sections. I think it's overkill, but for some reason I decided to use them all anyway.
Meetings Section - I deconstructed a Rhodia meeting book notebook for my meeting notes. I have almost a full notebook in here. Once I get through these pages I'll need to archive. I use a small oli clip to mark my place.
Deadlines Section - I use the JEN Action planner for my to do list. The pages are slightly larger than A5 so I had to cut them to size and punch them to fit. I've used these pages and my own interpretation of the autofocus list system for a very long time and it just works for me. I'm planning a separate post for how I manage my task list. (Sorry, had to pixelate out the list since this is for work).

Schedule Section - I do have the week on two pages schedule, which I am experimenting with using. Since I use Outlook for meetings, I am using the Filofax pages to track my time, and note my three most important tasks for the day. Not sure if I'll keep up with this, but trying it out.
My other sections are:
Projects - I print out information that I need to refer to frequently for projects
Notes - stores important reference information not related to a specific project
Upcoming - things I need to put on the agenda for upcoming meetings
Outgoing - really doesn't match the tab name, but I use this to track things I'm waiting on from other poeple
Travel - holds itinerary, travel rewards club information - pretty much anything related to work travel
Expenses - so far section is empty, but will hold receipts and expense report info for business travel
Urgent - holds information related to career development (Because it's urgent that I keep up to date on this, right?)
To Do - long term to do items whenever I have some downtime
Contacts - Frequently used company numbers, company locations
I have a scratch pad at the back where I can jot down information as needed.
So that's the setup for now :)
I also made my own dividers. I used an aqua paisley paper on the front, shocking pink polka dot paper on the back for an unexpected pop of color, and some washi tape. Rather than laminating the dividers, I used Mod Podge. I love this stuff. Laminated pages seem too stiff to me, but the mod-podged (is that a word?) pages are flexible and strong at the same time. Plus I used the glossy finish, so they have a nice sheen to them. I use the back side of the divider as a dashboard for the section when needed. I decided to use the girl of all work business tabs, and it came with twelve sections. I think it's overkill, but for some reason I decided to use them all anyway.
Meetings Section - I deconstructed a Rhodia meeting book notebook for my meeting notes. I have almost a full notebook in here. Once I get through these pages I'll need to archive. I use a small oli clip to mark my place.
Deadlines Section - I use the JEN Action planner for my to do list. The pages are slightly larger than A5 so I had to cut them to size and punch them to fit. I've used these pages and my own interpretation of the autofocus list system for a very long time and it just works for me. I'm planning a separate post for how I manage my task list. (Sorry, had to pixelate out the list since this is for work).
Schedule Section - I do have the week on two pages schedule, which I am experimenting with using. Since I use Outlook for meetings, I am using the Filofax pages to track my time, and note my three most important tasks for the day. Not sure if I'll keep up with this, but trying it out.
My other sections are:
Projects - I print out information that I need to refer to frequently for projects
Notes - stores important reference information not related to a specific project
Upcoming - things I need to put on the agenda for upcoming meetings
Outgoing - really doesn't match the tab name, but I use this to track things I'm waiting on from other poeple
Travel - holds itinerary, travel rewards club information - pretty much anything related to work travel
Expenses - so far section is empty, but will hold receipts and expense report info for business travel
Urgent - holds information related to career development (Because it's urgent that I keep up to date on this, right?)
To Do - long term to do items whenever I have some downtime
Contacts - Frequently used company numbers, company locations
I have a scratch pad at the back where I can jot down information as needed.
So that's the setup for now :)
I would love to hear/see more of how you you Autofocus and manage your lists. I've gotten some good ideas from this post - thanks for sharing!
ReplyDeleteThanks, Claudia, I'm glad you got some good ideas. I love getting ideas from other blogs too. I am planning a separate post on how I manage my to do list using the autofocus system, so stay tuned!
DeleteI am really interested in your modge podge solution as I am about to make dividers and also think laminating is rarher stiff. What do you do, just paint the paper with it? How is the finish then?
ReplyDeleteI really love the texture of the mod podge as opposed to laminated dividers. The dividers are strong yet flexible and I love the way they feel. You should try it out on a practice divider first to see how you like it and get the hang of how much mod podge to use. I find it best to lay out a sheet of wax paper, lay the divider on top, and then paint the divider with a thin layer of the mod podge. It will curl a little bit until it's dry but then it will lay flat. After the front is dry, use a new sheet of wax paper to lay the divider on and paint the back side. I've also used this technique on papers in my Filofax that I don't want to laminate, but want to give them more strength. Let me know how it turns out for you if you try it.
DeleteCongratulations on getting your ochre Malden, it's beautiful :)
ReplyDeleteI managed to swap my A5 Holborn zip to get one in vintage pink & I'm amazed at how much they can hold!
Thanks, Anita!. This is my first Malden and I really love it, I agree it can hold a ton of paper - which is great for a work binder!
Delete